Setup to connect the integration
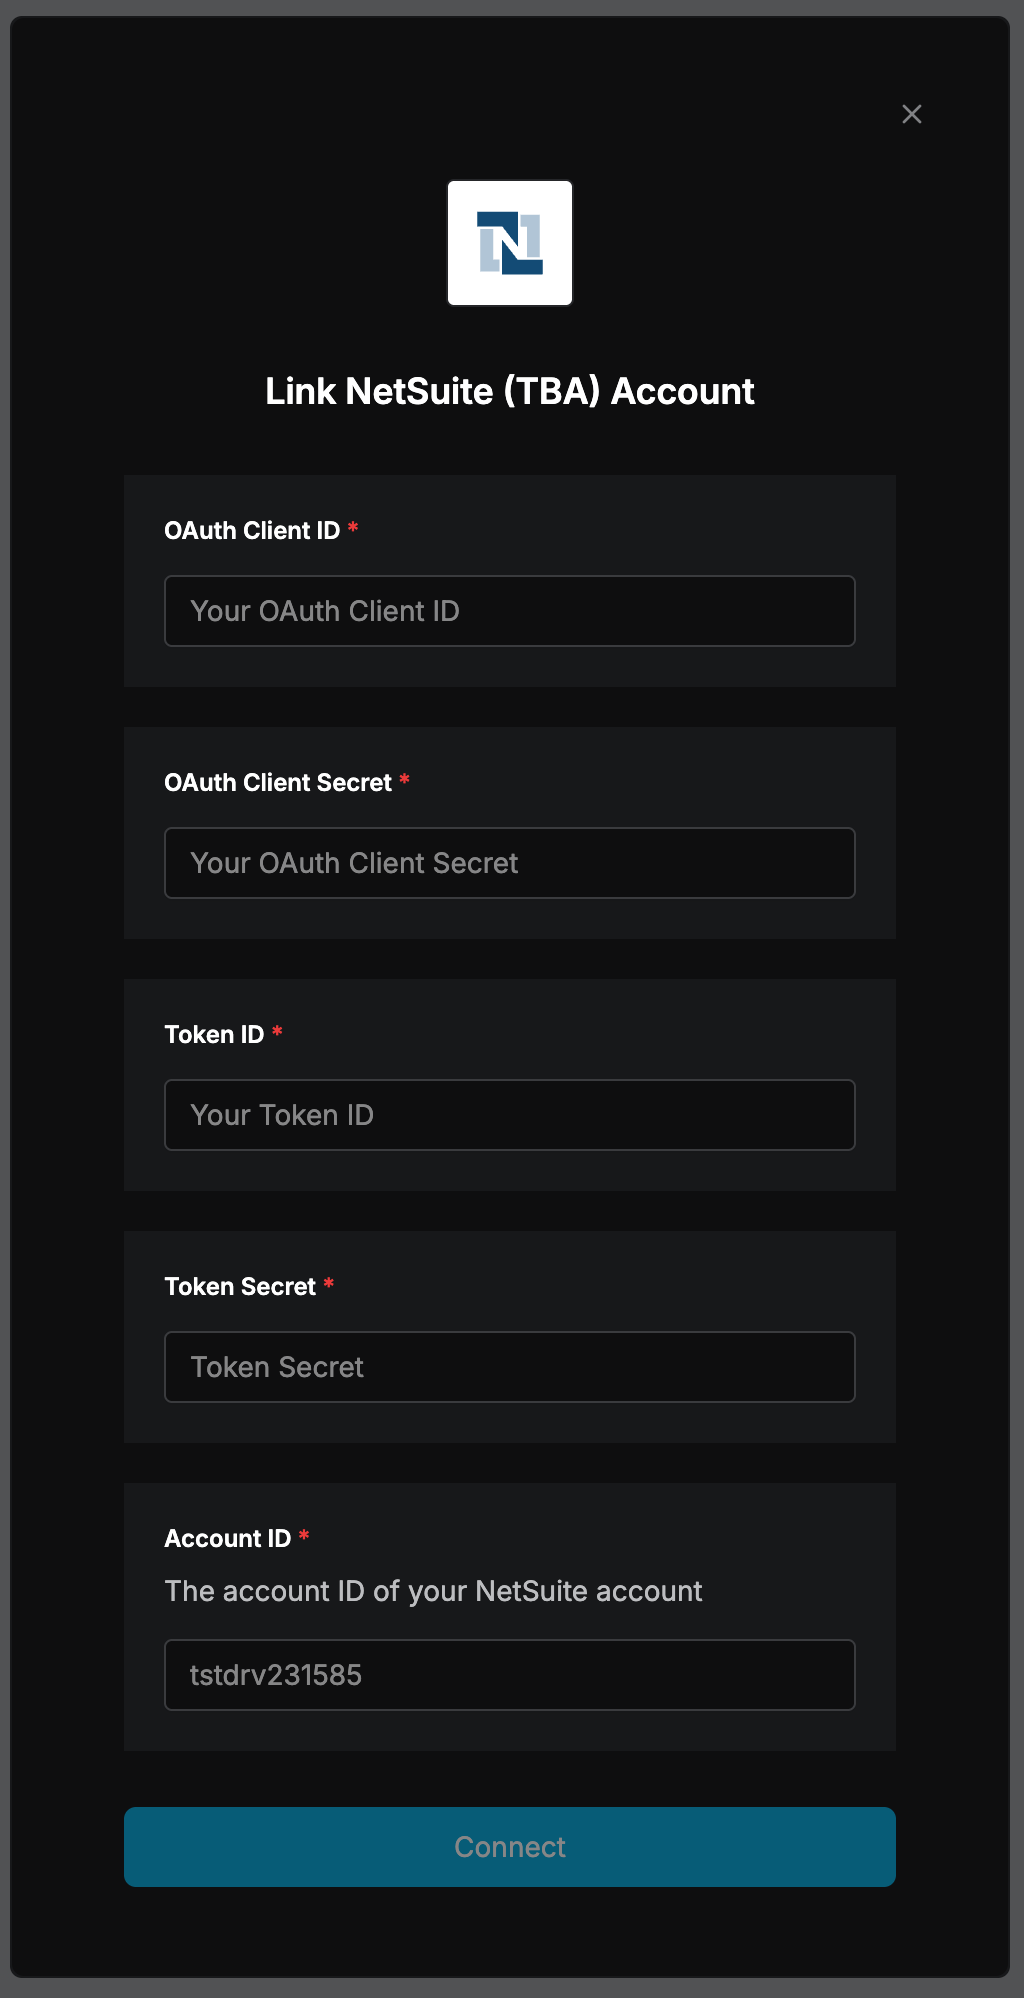
To link your NetSuite account to Electric ITHub you need these 5 values:
-
OAuth Client ID and Secret, Token ID and Secret, and Account ID.
Account ID: You can find your NetSuite account ID at the beginning of the NetSuite URL. For example, if the URL is https://1234567.app.netsuite.com/, your account ID is 1234567.
The following steps are a one-time NetSuite-side setup to produce the credentials needed to connect. Performed by a NetSuite administrator on the customer account.
1. Enable features
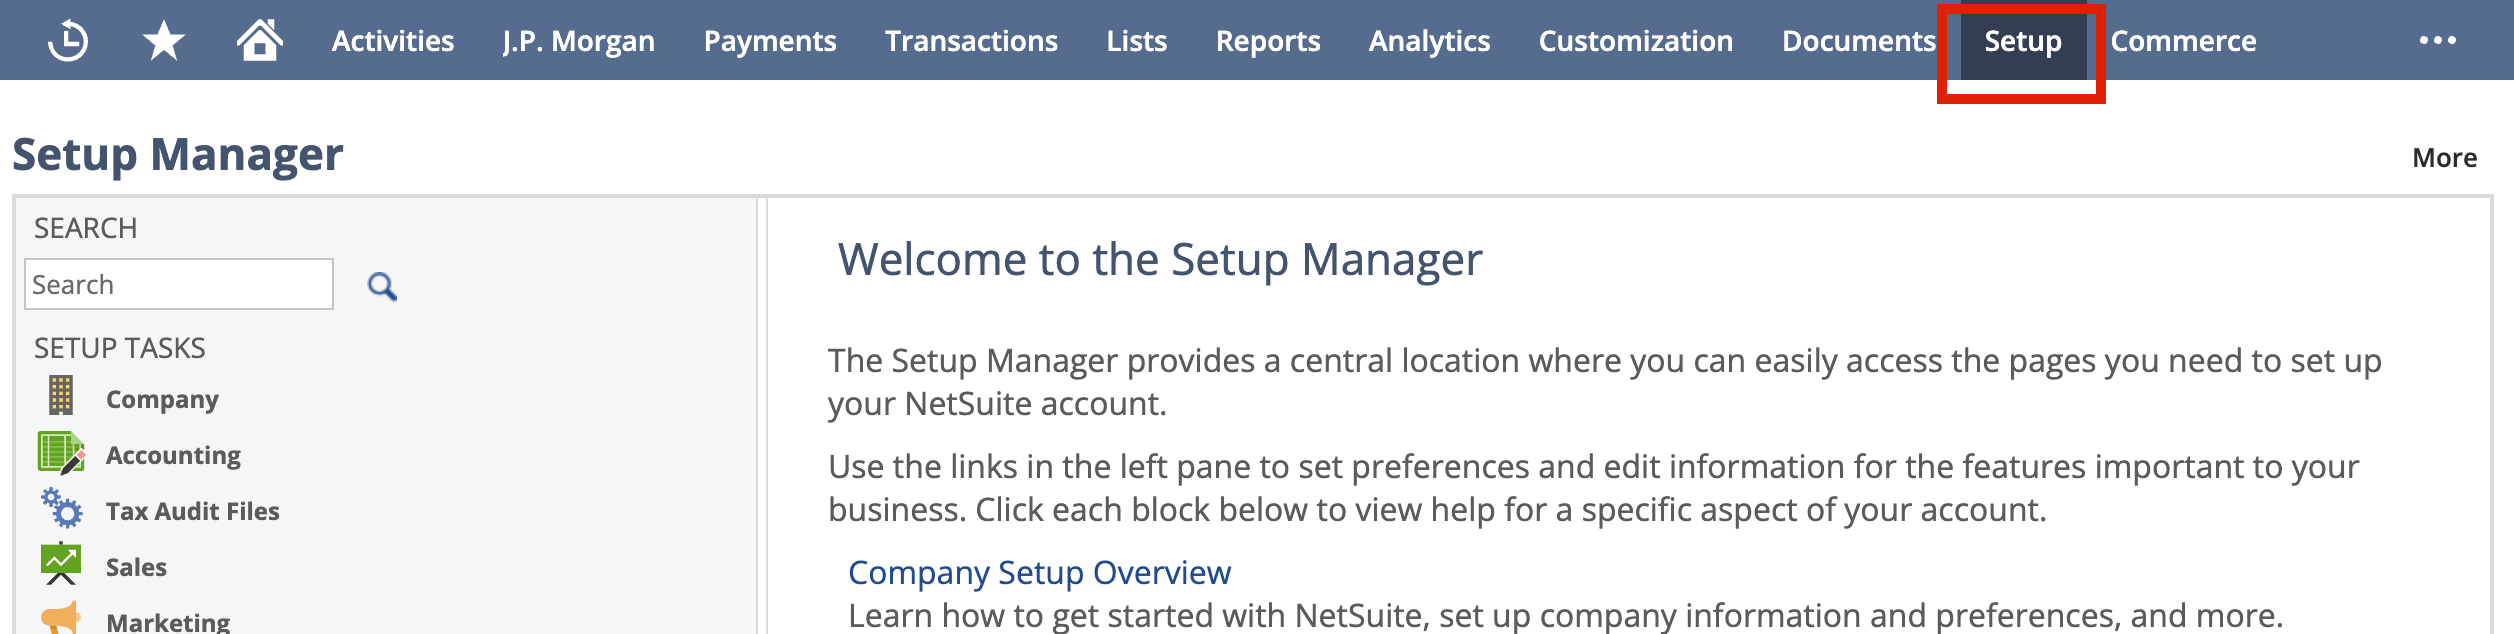
Go to Setup > Company > Enable Features
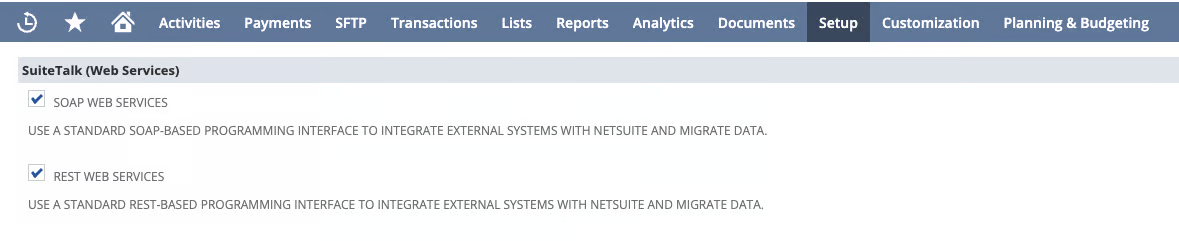
Click SuiteCloud, and under the “SuiteTalk” header, check both:
-
SOAP WEB SERVICES
-
REST WEB SERVICES
Under the “Manage Authentication” header, check:
-
TOKEN-BASED AUTHENTICATION
Analytics tab → SuiteAnalytics Workbook (required for SuiteQL)
Click Save button.
2. Create an integration record (consumer key/secret)
Go to Setup > Integration > Manage Integrations > New.
-
Enable:
-
TOKEN-BASED AUTHENTICATION
-
-
Disable both:
-
TBA: AUTHORIZATION FLOW
-
AUTHORIZATION CODE GRANT
-

-
Click Save button. The client credentials will now be displayed (these are the first 2 of 5 values we need to connect the integration). Copy and securely store:
-
Consumer Key (also called OAuth Client ID)
-
Consumer Secret (also called OAuth Client Secret)
-
3. Generate Access Tokens
If you want to create a token as an admin, the following are the steps to create Token ID and Secret for admin role. If you want to use a token with the minimum amount of permissions (recommended) jump to step 4 below.
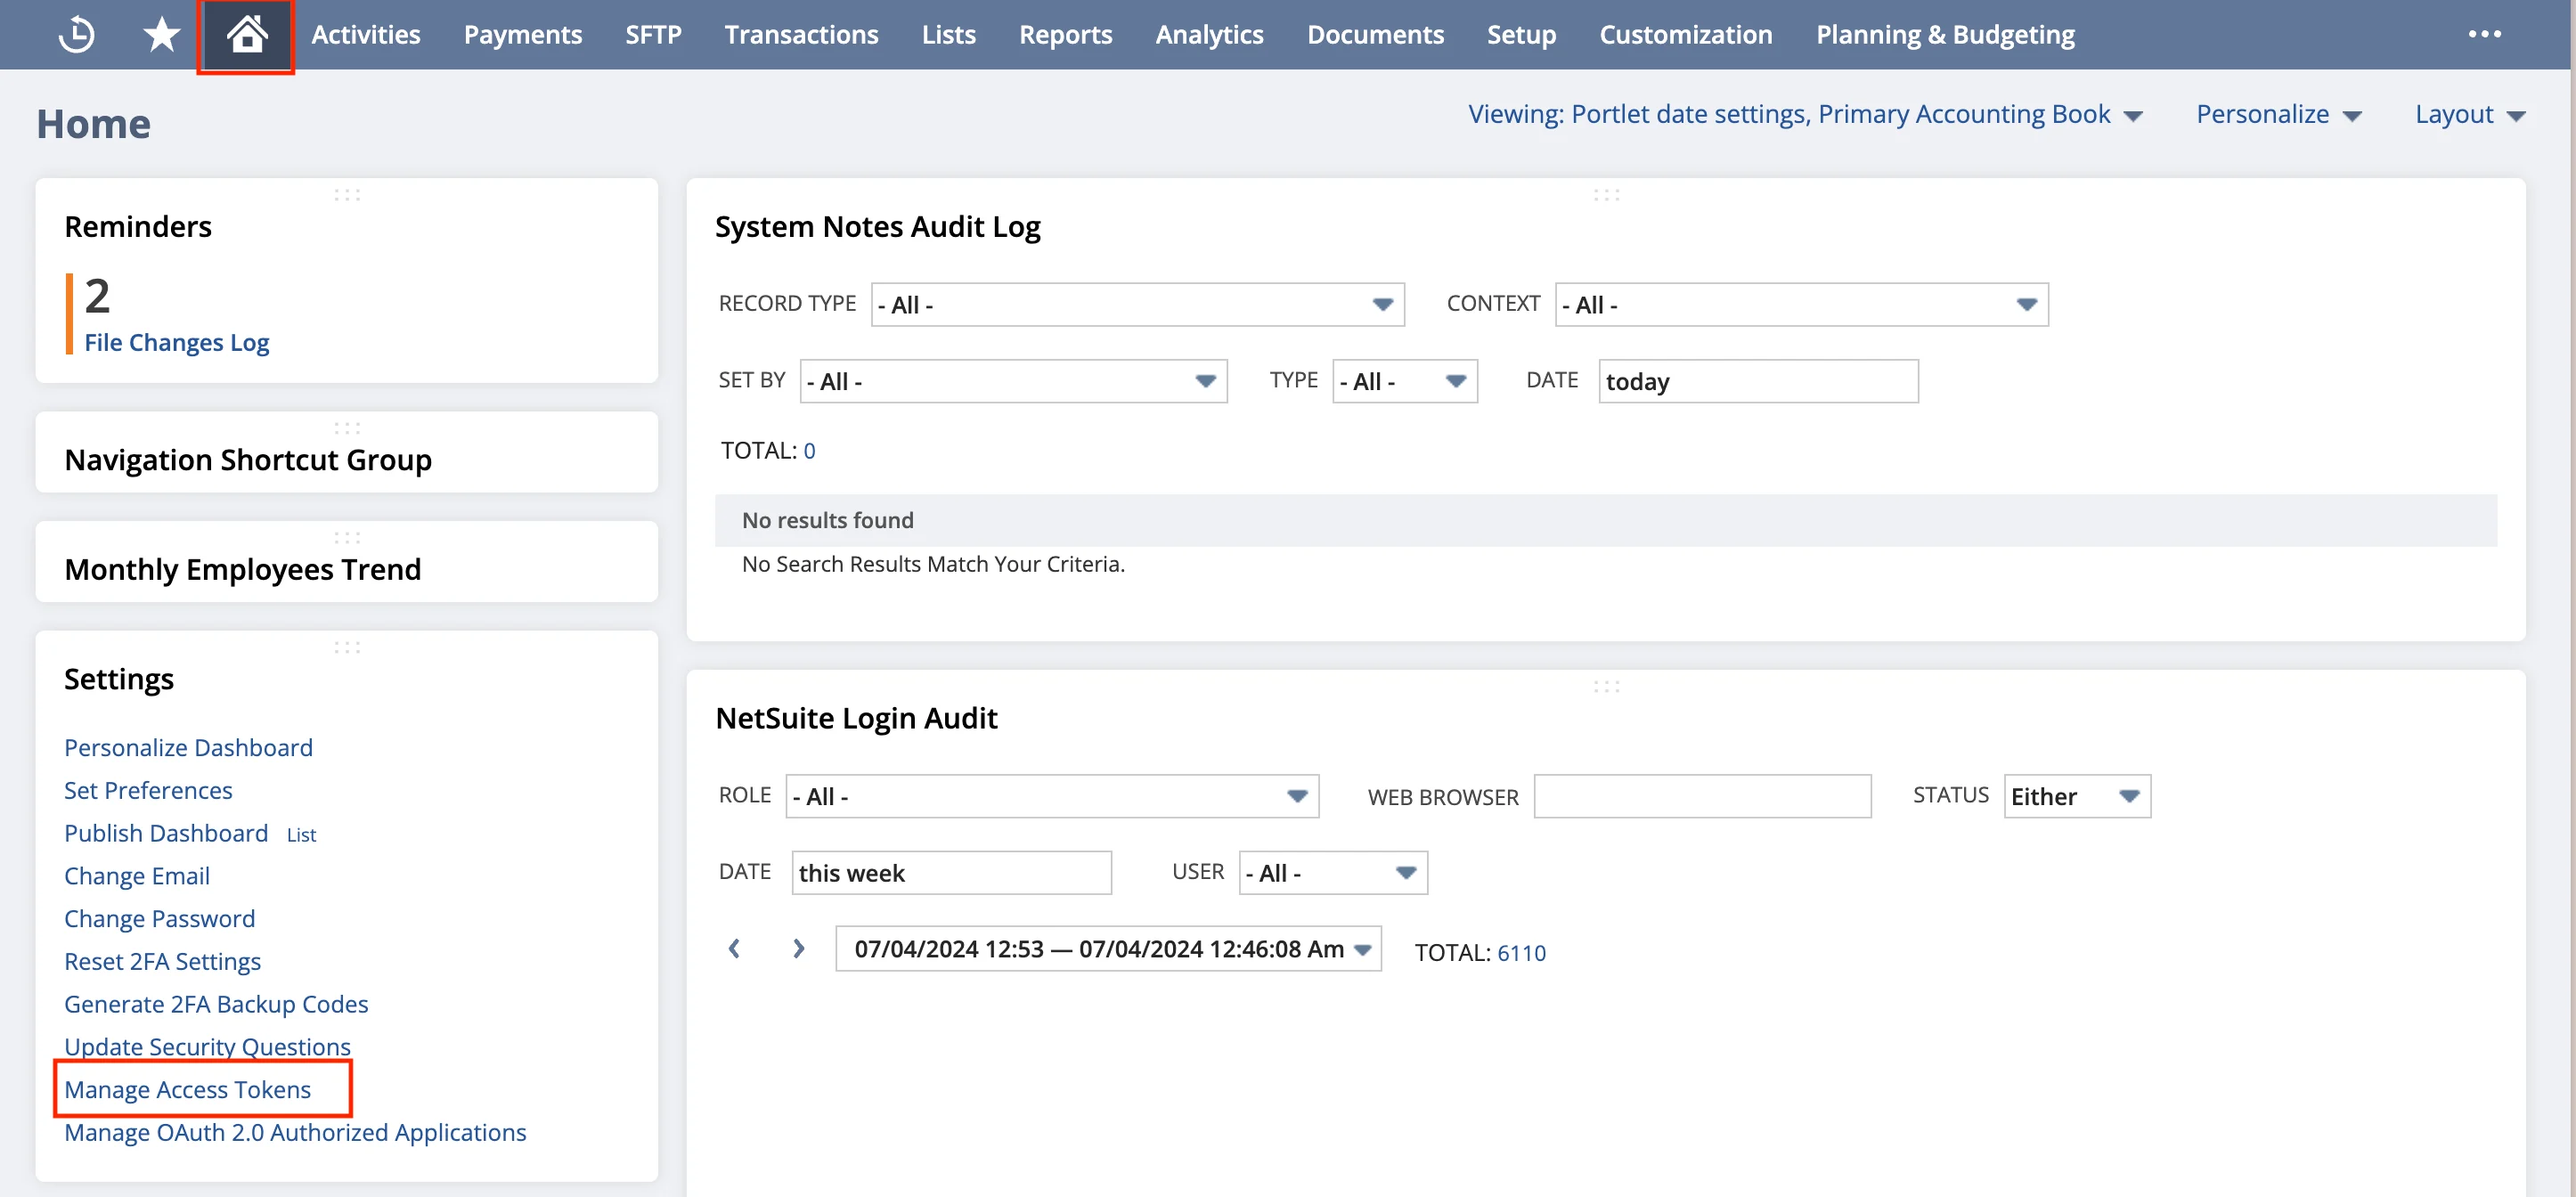
To create an admin token: Navigate to access tokens: Return to the homepage by clicking the home icon. At the bottom left corner, click the Manage Access Tokens button.
Create a new token
-
Select the Application Name you created for this integration
-
Enter a “Token Name”
-
Save your new access token
4. Non-Admin Role Setup
When setting up Netsuite TBA with a non-admin role, additional configuration is required. This section covers the necessary permissions and setup steps for non-administrator users.
Required Role Permissions
Create a new role to use for the integration.

-
Choose a name.
-
Under Subsidiary Restrictions (you may not see Subsidiary options if your account is not a OneWorld type):
-
Accesible subsidiaries: Active
-
Allow cross-subsidiary record viewing: Enabled
-
-
Under Permissions section at the bottom, add these permissions on these tabs:
-
Reports:
-
SuiteAnalytics Workbook → Level: Edit
-
-
Lists:
-
Employee Record → Full
-
Employees → Full
-
Perform Search → View
-
Subsidiaries → View
-
-
Setup:
-
Access Token Management → Full
-
Bulk Manage Roles → Full
-
Display Intelligent Recommendations → Full
-
Log in using Access Tokens → Full
-
OAuth 2.0 Authorized Applications Management → Full
-
REST Web Services → Full
-
SOAP Web Services → Full
-
-
Click Save button after all permissions are set.
Finally, create a token for this role following the steps below.
Creating Access Tokens with Specific Roles
To create an access token for a non-admin role:
-
Switch to the desired role using the role selector in the top-right corner
-
Navigate to Setup > Integration > Manage Access Tokens
-
Click “New Access Token”
-
Select your application from the dropdown
-
Provide a token name
-
Save and securely store the Token ID and Token Secret that are displayed.
At this point you Account Id, Client ID, Client Secret, Token ID and Token Secret to connect the integration.
The role selection at token creation time determines the permissions available to that token. Make sure you’re using the correct role before creating the token.
Permissions changes on a role impacts the corresponding token(s) immediately (no need to create a new token or reconnect the integration in this case)
Connect the integration on Electric
-
Connect the integration using the 5 values obtained on the previous step
-
Then, under Access & Settings tab, make sure to set defaults NetSuite Role, and NetSuite Subsidiary (if your NetSuite account is OneWorld), otherwise Create Account automation will not work.